Mastering Social Media Graphics in Procreate: A Beginner’s Guide to Native Tools
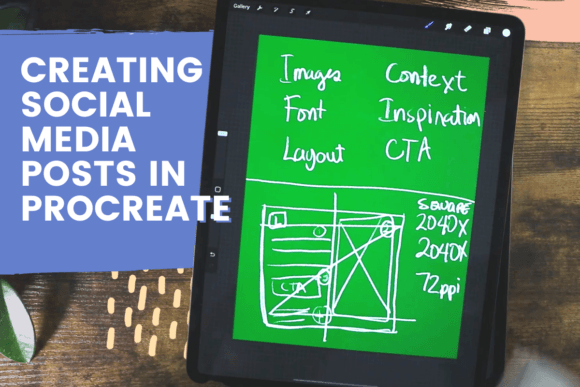
In the rapidly evolving landscape of digital content creation, the pressure to produce high-quality visual assets for social media platforms is constant. For many creatives, the barrier to entry has traditionally been the steep learning curve associated with professional desktop software or the cost of specialized equipment. However, Creating Social Media Posts in Procreate has emerged as a viable, efficient, and accessible alternative for designers at all levels. This approach leverages the intuitive interface of the iPad-based application to produce polished graphics without relying on external subscriptions or complex workflows.
The appeal of this method lies not just in convenience, but in its pedagogical structure. Under the guidance of experienced graphic designer Bryan C ngan, learners are introduced to a streamlined process that demystifies the app’s capabilities. By focusing exclusively on built-in functions, this educational path ensures that users understand the core mechanics of digital design rather than relying on pre-made shortcuts. This article explores the distinct advantages of this native approach, compares it to broader industry standards, and helps you determine if this workflow aligns with your creative goals.
The Distinct Advantage of Native Functionality
One of the most common misconceptions about digital illustration and graphic design is that success depends on acquiring third-party plugins, custom brush packs, or expensive add-ons. While these tools can enhance efficiency for advanced users, they often obscure the fundamental principles of design for beginners. The course centered on Creating Social Media Posts in Procreate deliberately strips away these dependencies. By restricting the toolkit to what comes pre-installed with the app, the instruction forces a deeper engagement with the software’s inherent logic.
This constraint is actually a strength. When you learn to manipulate standard brushes, layer modes, and selection tools effectively, you gain a transferable skill set. You are no longer dependent on a specific creator’s brush pack to achieve a certain look. Instead, you understand how opacity, flow, and texture interact. Bryan C ngan’s lessons emphasize this foundational knowledge, providing all necessary images and techniques within the class structure. This self-contained ecosystem means that whether you are using an older iPad model or the latest release, the core techniques remain applicable and consistent.
Furthermore, relying on native tools reduces file bloat and compatibility issues. Third-party brushes can sometimes cause performance lag or behave unpredictably after software updates. By mastering the default library, you ensure a smoother, more stable workflow that is less prone to technical disruptions during critical posting schedules.
Comparing Procreate to Traditional Graphic Design Workflows
To make an informed decision about adopting this workflow, it is essential to compare it with traditional alternatives. Most professional graphic designers are accustomed to vector-based software like Adobe Illustrator or raster-based giants like Photoshop. These desktop applications offer unparalleled precision, scalability, and typographic control. However, they also require significant hardware resources, monthly subscriptions, and a considerable amount of time to master.
Creating Social Media Posts in Procreate offers a different value proposition. It is primarily a raster-based environment, which means it excels at hand-drawn elements, textures, and organic compositions. For social media posts that rely on illustrative flair, personal branding, or artistic overlays, Procreate is often superior in terms of speed and tactile feedback. The Apple Pencil integration allows for a natural drawing experience that mouse-and-keyboard setups struggle to replicate.
However, there are tradeoffs. If your social media strategy relies heavily on rigid corporate branding guidelines, precise typography, or templates that need to be resized across dozens of formats instantly, vector-based tools may still be the better choice. Procreate’s text handling, while improved, lacks the advanced paragraph styling and global edit features found in desktop publishing software. Therefore, this approach is best suited for creators who prioritize unique, hand-crafted visuals over rigid, template-driven consistency.
Ideal Use Cases and Limitations
Understanding when to use this method is crucial for maximizing its benefits. The workflow taught in Bryan C ngan’s class is particularly effective for:
- Personal Branding: Influencers and coaches who want their feed to feel authentic and hand-made rather than corporate.
- Illustrative Content: Posts that combine photography with hand-drawn annotations, doodles, or artistic frames.
- Rapid Prototyping: Quickly visualizing ideas for campaigns before committing to more time-intensive production methods.
- Small Business Marketing: Entrepreneurs who need to create engaging visuals without hiring a dedicated design team.
Conversely, this approach may have limitations for large-scale enterprises. If you need to collaborate with a team where multiple people edit the same file simultaneously, or if you require strict adherence to CMYK color profiles for print extensions, Procreate’s current feature set may fall short. It is a solitary, screen-based tool designed for individual creativity rather than collaborative, multi-platform asset management.
Evaluating the Learning Curve
A major concern for adults entering the digital design space is the time investment required to become proficient. Many tutorials assume prior knowledge, leaving beginners frustrated. In contrast, the instruction provided by Bryan C ngan is structured to accommodate absolute novices. The lessons are designed to be easy to follow, regardless of whether you have opened Procreate before or if this is your first encounter with digital art.
The curriculum moves logically from the basics to complex specifics. You begin by understanding the interface and basic gestures, then progress to layer management, masking, and blending modes. This scaffolding approach ensures that you do not feel overwhelmed. By the end of the course, the goal is not just to complete a single project, but to master Procreate in no time through repeated, guided practice. The provision of all necessary images means you can focus entirely on technique rather than spending hours sourcing stock photos or creating assets from scratch.
Decision Factors for Aspiring Designers
When deciding whether to invest time in Creating Social Media Posts in Procreate, consider your current resources and long-term goals. If you already own an iPad and Apple Pencil, the financial barrier is non-existent beyond the one-time purchase of the app. This makes it a low-risk, high-reward option for experimentation.
Additionally, consider your aesthetic preferences. Do you value the organic, imperfect beauty of hand-drawn lines? Or do you prefer the clean, mathematical precision of vector graphics? If the former resonates with you, this workflow will feel natural and rewarding. If the latter is your priority, you might find the raster-based nature of Procreate limiting for certain types of corporate communication.
It is also worth noting the community aspect. Learning through a structured class provides access to a network of peers facing similar challenges. This support system can be invaluable for troubleshooting and inspiration, something that self-teaching via fragmented online videos often lacks.
Final Thoughts on Choosing Your Design Tool
The digital design landscape is not one-size-fits-all. While powerful desktop suites remain the industry standard for large agencies, there is a growing demand for agile, personal, and accessible tools. Creating Social Media Posts in Procreate represents a shift towards democratizing design, allowing individuals to produce professional-grade content without the overhead of traditional software.
Bryan C ngan’s approach highlights that mastery comes from understanding the tools you have, not accumulating more tools. By focusing on built-in functions, you develop a robust foundation that serves you well across various creative projects. Whether you are looking to enhance your personal brand, support a small business, or simply explore a new creative hobby, this method offers a balanced, practical, and enjoyable path forward. Evaluate your needs, consider the tradeoffs, and decide if this intuitive, iPad-centric workflow is the right fit for your creative journey.